The landscape of corporate social responsibility is undergoing…
The Process of Miyawaki Forest Creation
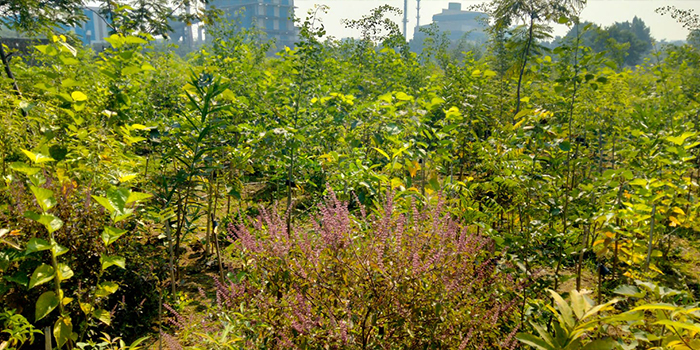
In an age where green cover is rapidly shrinking, the Miyawaki forest technique offers a
scientifically proven way to restore balance — fast. Developed by Dr. Akira Miyawaki, a
Japanese botanist and ecologist, this method focuses on recreating natural, multi-layered
forests using native species. These forests grow ten times faster, become thirty times
denser, and absorb more carbon dioxide than conventional plantations — making them a
powerful tool against climate change.
Creating a Miyawaki forest is a carefully structured process — one that merges ecology,
engineering, and human commitment. Here’s how it unfolds, step by step.
1. Site Assessment and Soil Testing
The journey begins with understanding the land itself. Experts first conduct a detailed site
analysis — checking the topography, drainage, sunlight exposure, and proximity to pollution
sources. This is followed by soil testing to determine pH value, moisture retention, and the
presence of essential nutrients like nitrogen, phosphorus, and potassium.
The findings help identify whether the soil needs enrichment and what organic components
would improve its fertility and aeration.
2. Cleaning and Preparation of the Site
Once the analysis is complete, the area is cleared of debris, stones, and weeds. However, this
step is carried out without disturbing the existing soil structure. The goal is to create a clean,
breathable canvas for regeneration. Large stones and impermeable waste are removed to ensure
roots can spread freely.
3. Soil Re-engineering and Enrichment
The soil is then re-engineered using organic additives to create the ideal growing environment.
A mixture of biomass, rice husk, compost, cow dung, and coco peat is blended into the top
layer.
• Compost and cow dung provide nutrients and microbial life.
• Rice husk enhances drainage and prevents compaction.
• Biomass (such as dried leaves or straw) adds long-term organic content that breaks
down gradually.
This mix ensures that the soil remains porous, nutrient-rich, and capable of supporting dense
root systems — just like in natural forests.
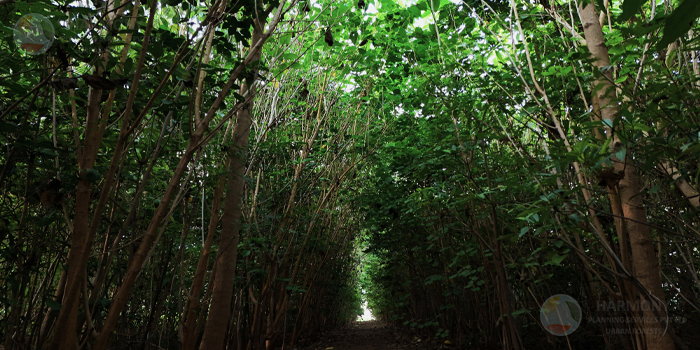
4. Levelling and Grid Marking
After soil re-engineering, the land is levelled to maintain uniform water distribution. Then, a
grid layout is marked on the surface to plan the dense plantation — usually 1 square meter per
grid, accommodating 3 to 5 saplings per square meter. This layout ensures even spacing while
maintaining the close planting pattern essential to the Miyawaki method.
5. Excavation and Pit Preparation
In each grid, small planting pits are excavated — typically 30–45 cm deep. Stones and hard
clumps are manually removed to facilitate root growth. The pits are then refilled with the
enriched soil mixture, creating soft, nutrient-packed beds for the saplings.
This step ensures that each plant has access to the right balance of nutrients, moisture, and air
in its early stages.
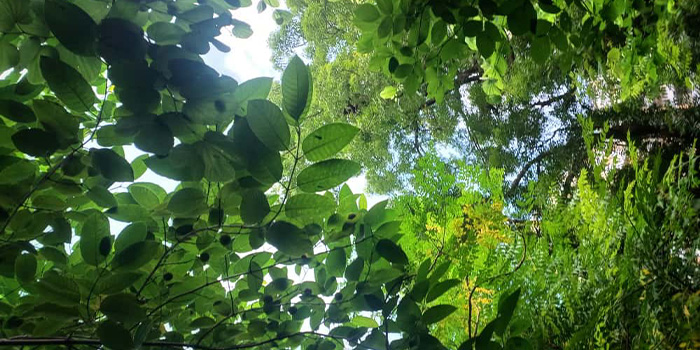
6. Selection of Local and Native Species
The selection of species is one of the most critical stages. Only indigenous trees and shrubs are
chosen — species that are naturally suited to the local climate, rainfall, and soil conditions.
Typically, 35–40 species are selected to create a balanced ecosystem with four natural layers:
• Shrub Layer (1–3 m): Small plants and shrubs (e.g. Hibiscus, Ardusi etc.).
• Sub-tree Layer (3–6 m): Medium-sized trees (e.g. Shehtoor, Palash etc.).
• Tree Layer (6–10 m): Larger native trees such (e.g. Neem or Jamun etc.)
• Canopy Layer (10+ m): Tall, mature species like (Banyan, Kadamb etc.)
This diversity ensures that the forest mimics a true natural ecosystem — self-sustaining and
biodiverse.
7. Designing Plant Groups and Plantation
Based on the grid plan, species groups are designed and assigned so that taller species are
distributed evenly, with shrubs and mid-height trees interspersed. This arrangement maximizes
vertical growth and sunlight sharing.
Saplings are then planted closely, one by one, by hand — a labor of care and precision. The
planting is immediately followed by a thick layer of organic mulch to retain soil moisture,
suppress weeds, and protect the young roots.
8. Bamboo Support and Thread Tying
To protect young saplings from wind and physical disturbance, bamboo sticks are installed
beside each plant. The saplings are gently tied to the bamboo using natural jute or coir thread.
This provides structural support until the roots are strong enough to anchor the plant
independently — typically within the first few months.
For the first two to three years, the young forest requires regular watering, mulching, and
manual weeding. Once the canopy closes, the forest becomes self-sustaining, retaining its own
moisture and regenerating leaf litter naturally. Within 24 to 36 months, a lush, self-sufficient
ecosystem begins to thrive.
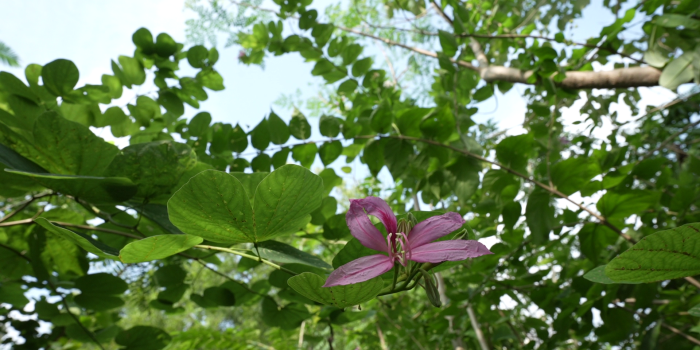
The Miyawaki process isn’t just about planting trees — it’s about reviving nature’s rhythm in
urban spaces. Each forest becomes a haven for birds, butterflies, insects, and microorganisms.
The air becomes cleaner, the soil richer, and communities more connected to nature.
Through careful science and human intention, the Miyawaki method shows that we don’t have
to wait decades to see forests grow — we just have to plant them the right way.
Related Posts